

header layer

Last Updated - September 25, 2026

Objects of Reference BH

What ‘objects of reference’ are

An object of reference is an object that has a particular meaning, e.g. a certain ball represents
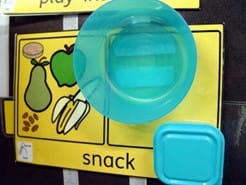
going out to play, a bubble wand represents come and blow bubbles or a snack box represents come
and sit for snack time.

How objects of reference can be used

They can help a child understand what is happening or is about to happen, e.g. being shown a spade means the child is about to be encouraged to move to the sand tray area.

They can support a transition from place to place, your child is indoors and it’s time to go outside to the sandpit, so show them the spade to support their understanding of what is about to happen as it happens.

How to select your objects

  • An object of reference needs to be chosen carefully and appropriate for the child.
  • Objects should be chosen for routines that are the most meaningful and motivating for the child.
  • Objects should be used consistently and will need to be used a number of times before a child will begin to anticipate and predict what it means.

How to start using objects of reference

  1. You may find it helpful to collect your objects of reference and have them kept in one place, e.g. in a box, basket or on a shelf, somewhere everyone can easily get to.
  2. Keep your language as simple as you can, e.g. child’s name first “James” “snack time” alongside showing him the object.
  3. Allow the child to hold the object and engage with the object whilst moving to the area/activity.
  4. Agree with others who look after your child that you use the same words, e.g. decide on “outside” or “playtime”, “food” or “snack” and so on. This will help your child to understand language as they see the associated object.

Download a printable version of Objects of reference and how they can be used.


Choice making using objects of reference

Encouraging a child to make a choice between two items is the beginning of teaching children to:

  1. Make requests by reaching, pointing or vocalising.
  2. Learn the ‘back and forth’ element of communication with an adult ie the adult shows the child a
    choice, the child then responds by indicating what they want, followed by the activity happening or
    having the item.
  3. Listen to the word of the object modelled by the adult, so building on receptive vocabulary.

Important tips when offering choices

  • Be specific i.e. the name of the object, photo or picture NOT ‘this or that’
  • Show as you say i.e. move the object, photo or picture towards the child as you label it
  • Create choice making opportunities in play and routines as much as possible
  • WAIT for your child to respond

Here are some examples of choice making visuals that you may find helpful. These are ranked in
order of difficulty beginning with the use of real objects which are easiest to understand. There is a
short explanation of what is involved with each example to help you decide which may be most
appropriate for your child.

More information and examples of support can be found in the following video


Making a choice using objects

Show the child the objects that relate to the choice they are making, for example what activity they want to do. It is easier to start with choices that involve one item that is desirable for the child and
one item that is not particularly interesting.

Imagine a child has been given 2 choices using objects, the duck or the lorry. The child is not bothered by the duck and really likes lorries. In this way you will know that the child is able to make a clear choice or request for something they want to do.

Further information and practical examples about using this strategy to support a young child’s
communication can be found in the following video:

Please note: the more objects that the child is shown at any one time the harder it will be for the child, to scan and not be distracted.

    Making a choice using a photograph

    A photograph of the object used in place of the object itself, should initially be the same size as the
    actual object making the connection for the child between the two much easier to make.

    • These photographs can be used on a choice board or on their own.
    • Using a phone to take photos can also help and will serve as a useful tool to share with your child.
    • You can then reduce the size of the photos and increase the amount to make the choice broader for the child.
    • Again, high motivators and less desirable items can be included to ensure that a clear choice is being made.
    • Having the words underneath will ensure that adults are consistent with their naming.

    Making a choice using picture symbols

    This time, instead of photographs, picture symbols are used on a choice board to show the
    children what is available to choose from increasing the level of difficulty.

    Download a printable version of Choice making using objects of reference

    Print
    Skip to content